
As I am into building my own circuit boards and electronic designs I thought I would have a go at building my own motor controller for my Ant robots.
There are several great people building and selling their own controllers at AWS (Antweight World Series) events, and there are several board options available for off the shelf solutions. These include using servo boards from servo’s which have been modified to run the motors without feedback loops, Baby-Orangutan boards, which are microcontroller boards with built in TB6612 motor driver chips and software libraries well documented for them, and speed controllers like the Sozbots, Sabertooth, Robot power scorpion and so on.
I felt that I wanted to build one, and trial out some board manufacturers at the same time. – Although I can make my own boards with my bubble etch tank and UV light boxes, I think it is time to move on from acid and messy stuff and get the pros to do it.
So I have used the Baby-o before for a small toy I made, and I know there is software available for motor control and that it is used for antweight competitions so this was a good start.
I had a supply of microcontrollers from previous work place as samples, so wanted to use these, and the Baby-O uses the TB6612 motor controller chip so I used these.
Microcontroller – ATTINY44
Motor controller – TB6612
Voltage regulator – 78M05RW032
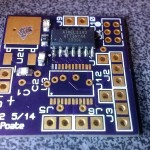
A breadboard was made including making a breakout PCB using the etch tank… for the SOIC 14 pin microcontroller and programmed using the code I shown in a previous post. Wired up to an Rx receiver and away it went. Both motors working with speed control and mixing.
So board design was completed, now to turn to Proteus to design a board.
Below is an image of the circuit schematic.
This was then made into a PCB and ordered from OSH Park in the USA.
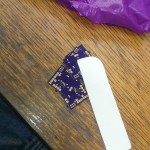
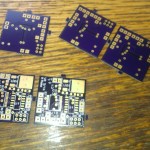
The board dimensions are 1 inch x 1 inch so for 6 boards, which was $10.10 including shipping! So… 9 days later… they arrive!
-
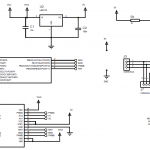
- Schematic
-
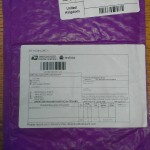
- Purple bag – purple associated with OSH Park due to their purple Solder Mask
-
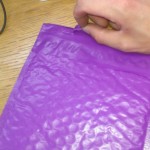
- Tension… oh the tension
-
- With a sticker too!
-
- 6th board not shown… but its the same…
-
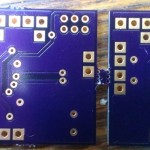
- The Vias look amazing!
-

- Boards looking fab!
-
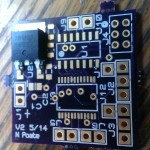
- Test fit of D-Pak regulator
-
- Test fit in another angle
-
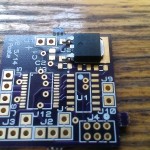
- Reflow oven attempt number 1
-
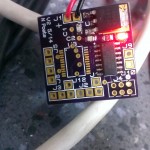
- And i got the LED the right way round!
The reflow oven I used was a standard 900 watt toaster oven which I bought from a car boot sale for £4. I had some solder paste I bought from eBay in 2008ish… which was sold as out of date (manufactured 2007. Now considering these have a shelf life of 6 months, unless kept in a fridge then its 12 months) I think it’s alright! I mixed a bit up with some flux from a flux pen and put it into a new syringe with a ‘green’ dispensing needle. This seems to have gone great, so I didn’t need to buy my new solder paste (Classical Mechanic Solder Paste).
The controller of the oven is a RefloLeo v1.2 which I helped fund (bought) from kickstarter (https://www.kickstarter.com/projects/1034145369/refloleo now available via his shop –https://www.tindie.com/stores/jkicklighter/
The reflow oven I used was a standard 900 watt toaster oven which i bought from a carboot sale for £4. I had some solder paste i bought from eBay in 2008 ish… which was sold as out of date (manufactured 2007. Now considering these have a shelf life of 6 months, unless kept in a fridge then its 12 months) i think its alright! I mixed a bit up with some flux from a flux pen and put it into a new syringe with a ‘green’ dispensing needle. This seems to have gone great, so i didn’t need to buy my new solder paste (Classical Mechanic Solder Paste).
The controller of the oven is a RefloLeo v1.2 which I helped fund (bought) from kickstarter (https://www.kickstarter.com/projects/1034145369/refloleo now available via his shop –https://www.tindie.com/stores/jkicklighter/
So you may be wondering what about the motor controller chip, that TB6612…. why is it not on the board? Well, you would be asking the right question…
Turns out I have misplaced the pack of motor controllers, and in haste to test the boards out, i thought, sod it lets have a go using the solder oven and seeing how well these boards go, considering the regulators, microcontroller were free. The caps and resistors were bought in a huge pack for about £5 from china, and the LED, mabe 20p… so if akll goes horribly wrong I havn’t lost out.
I have bought some new motor controllers from internet, and when they arrive, or if i find my other ones, i will add the solder to the board and re-reflow with the chip fitted too. All i need to do then is to wire in the motor leads and Rx leads (or use Dx31) and programme!
Note: code examples to work on are here: http://bildr.org/2012/04/tb6612fng-arduino/
also https://gist.github.com/tominated/8216236
http://letsmakerobots.com/content/read-pwm-value-rc-rx-arduino